


 17 / 60

Banded Belts
Installation Guide
17
Torque Team
®
V-Belts
Installation Guide
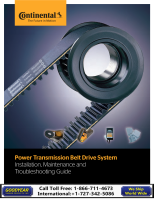
4. How to remove a sheave with a QD® hub
Place two of the pull-up bolts in the tapped holes in the sheave.
Turn the bolts alternately and evenly. They will push against the
bushing flange and act as jackscrews to break the grip between
the bushing and the tub.
Split Taper Bushing
If the sheaves are made for split taper
bushings, follow these installation and
removal instructions:
5. How to install split taper bushing sheaves
Put the bushing loosely in the sheave and start the capscrews.
Place the assembly on the shaft. Align both edges of the sheave
with the edges of its mating sheave (example: the sheave on
the driven shaft).
Tighten the capscrews according to the instructions furnished
with the bushings.
6. How to remove split taper bushing sheaves
Remove all capscrews.
Put two of the capscrews in the tapped holes in the flange of
the bushing.
Turn the bolts alternately and evenly until the sheave
has loosened.
Remove the sheave/flange assembly from the shaft.
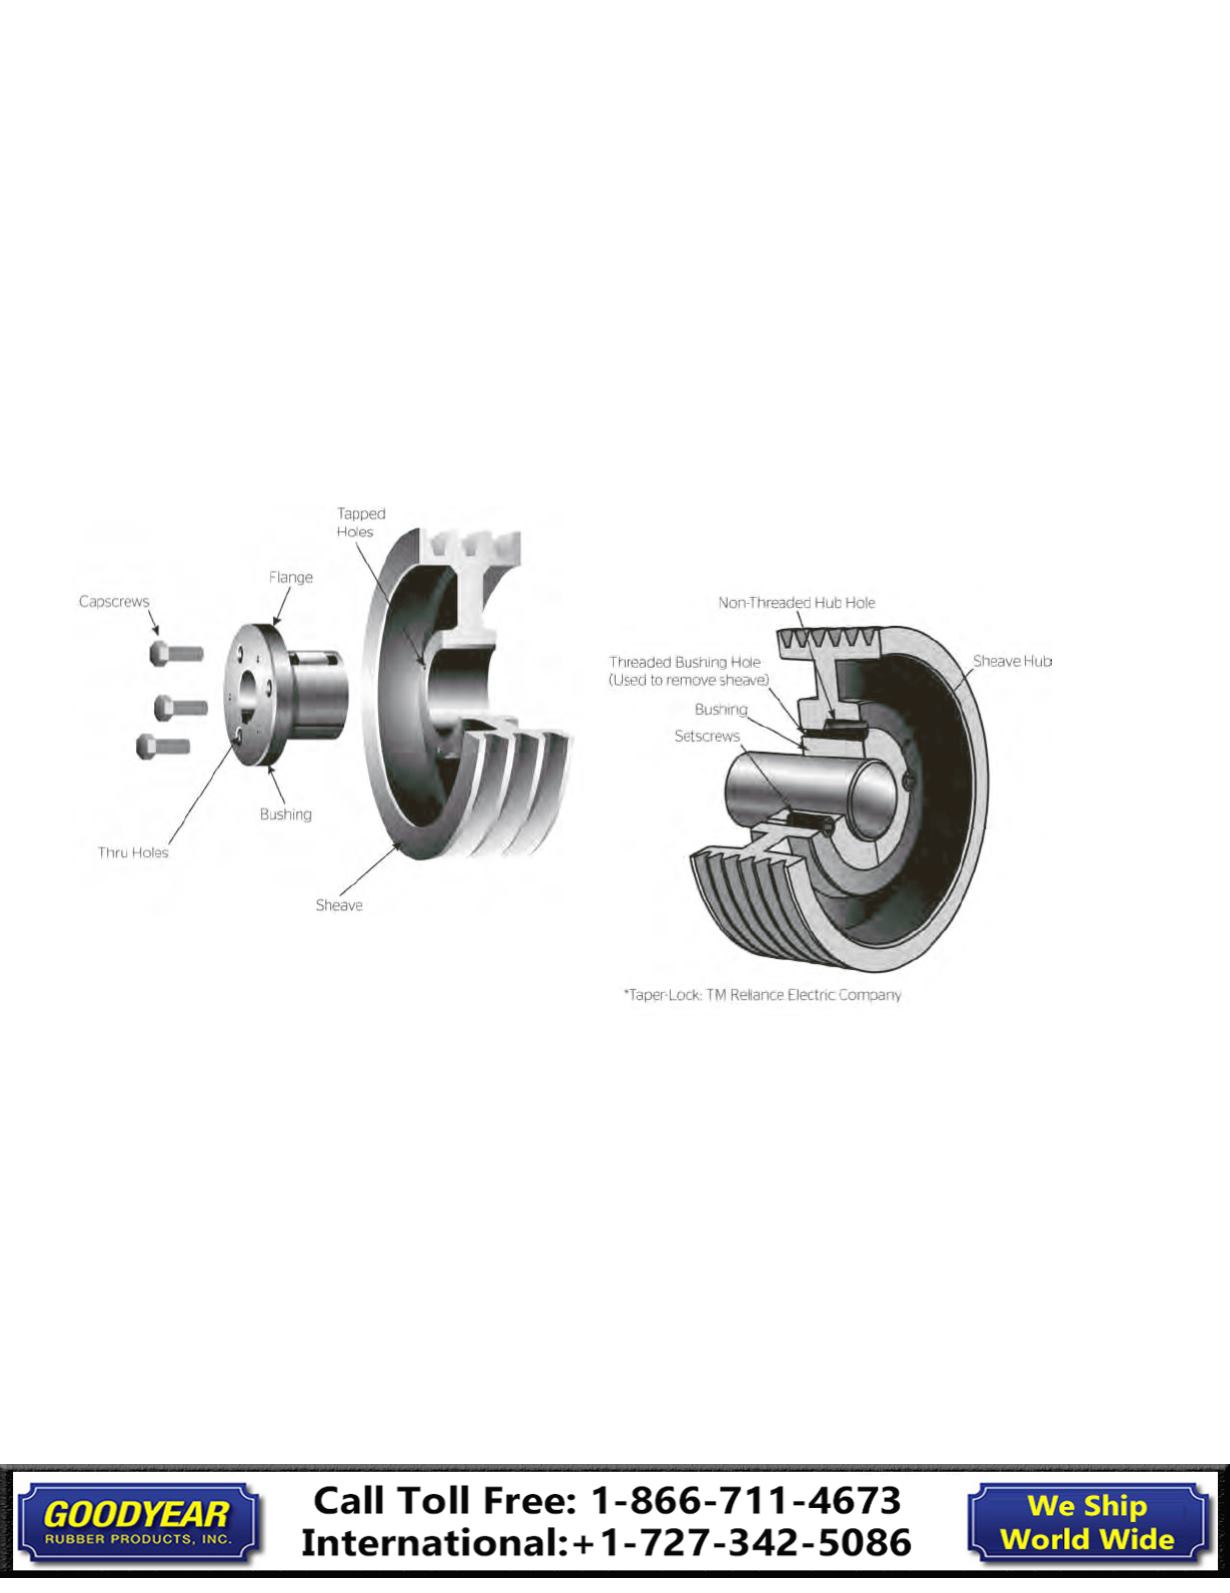
Taper-Lock Bushing
7. How to install a sheave made with a
taper-lock hub
Look at the bushing and the hub. Each has a set of half-holes.
The threaded holes in the hub are the mates to the non-threaded
holes in the bushing.
Insert the bushing in the hub and slide it onto the shaft. Align a
threaded hub hole with non-threaded bushing hole.
Start the setscrews into the holes that are threaded in the hub
only. Do not tighten the setscrews yet.
Align both edges of the sheave with the edges of its mating sheave.
Tighten the screws alternately and evenly. This procedure will
wedge the bushing inward and cause it to contract evenly and
grip the shaft.