


 108 / 114

SECTION
SUBSECTION
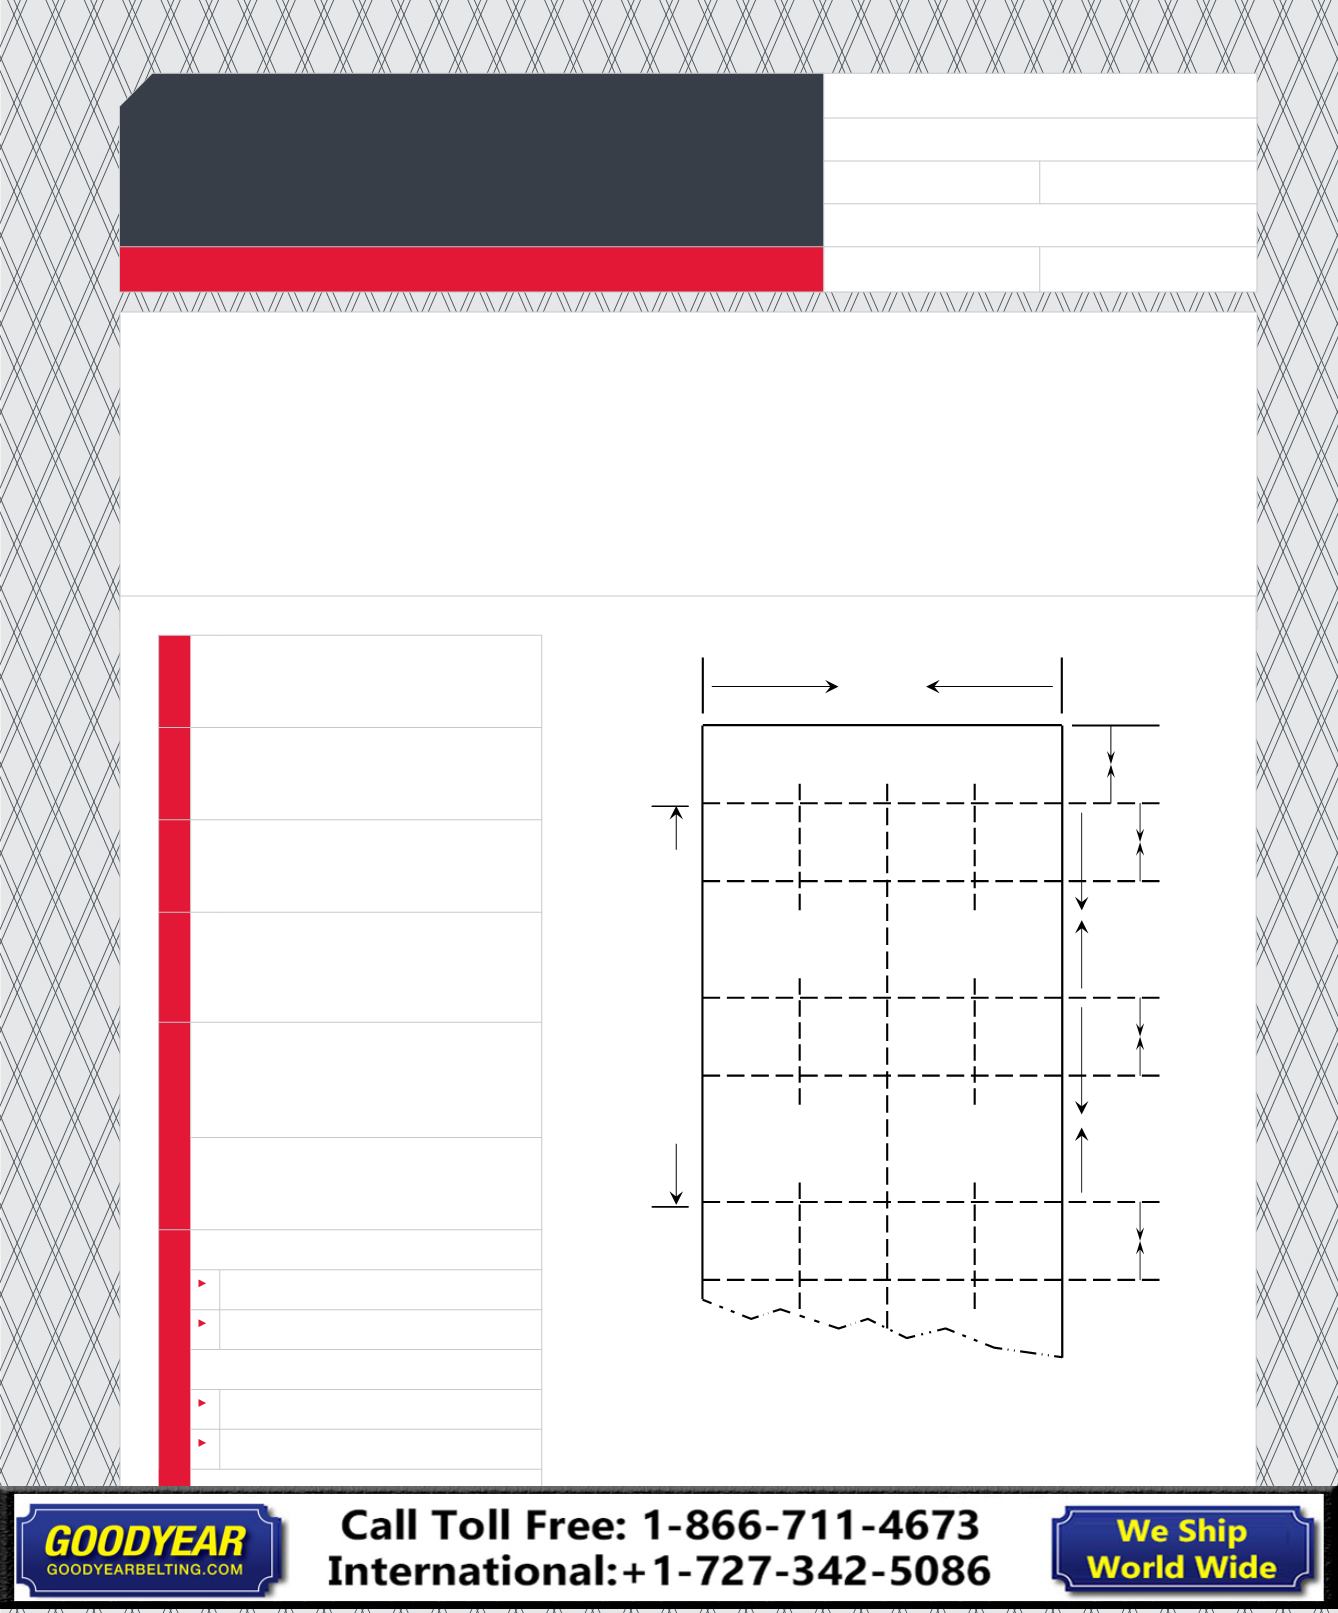
PUNCHING DIAGRAM MUST BE SIGNED AND APPROVED BEFORE PRODUCTION BEGINS.
Please folllow these instructions:
1
Draw in all holes to be punched, clearly indicating dimensions from the center line.
2
If there is only one row of holes across the belt per bucket, cross out the second row shown.
3
In the case of staggered buckets, be sure to note this on the diagram and indicate relative position of buckets on belt.
4
If any special instructions are necessary to punch the belt for butt or lap joints, note this beside the diagram below.
5
Unless otherwise specified belt will be punched the entire length with the spacing shown.
Bucket space for staggered pattern only
Center line
of belt
Center line
of belt
Belt
Width
WORKSHEET NUMBER
BELT WIDTH
BUCKET SPACING SAME ROW
DISTANCE FROM END OF BELT TO FIRST
ROW OF BUCKETS
DISTANCE BETWEEN FIRST ROW
AND SECOND ROW OF HOLES
DIAMETER OF HOLES TO BE PUNCHED
SPACING OF HOLES
First row:
Second row:
NUMBER OF HOLES
First row:
Second row:
BUCKET SIZE
Special instructions:
NAME:
COMPANY:
PHONE #:
FAX #:
EMAIL:
DATE:
REF P.O. #:
ELEVATOR BELT PUNCHING
DIAGRAM WORKSHEET
Here’s what we need from you.