Page 68 - FluoropolymerHoseCatalog5162F
SEO Version


66
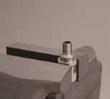
Push hose bore onto nipple to size tube and to aid
in separating braid before assembling ferrule onto
hose.
Once completed, remove hose from nipple.
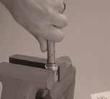
3
Assembly
Mount nipple hex in vise. Ensure nipple end extends beyond vise jaws suffciently to allow installation of hose.
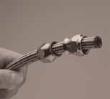
2
Assembly
When installing sockets on hose, check hose
ends to determine if wire braid “necks down”
(bends inward). If one end “necks down” use this
end to slide sockets onto hose.
Slide two sockets over end of hose with bottom of sockets back to back. Position sockets at each end of hose.
NOTE
Field Attachable Fittings
HOSE ASSEMBLY & CRIMPING
FITTINGS
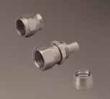
–Inspect each component for possible
damage. In addition, inspect socket and nipple
for a through-hole and threads.
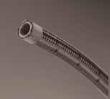
Hose – Visually inspect both ends of hose for square cut. Remove any burrs, loose fbers or wires.
1
Inspection
Technical
Powered by FlippingBook Publisher